


Why Heat Press Settings Affect Your Final Design
If you're in the business of creating custom apparel, signage, or promotional products, you've likely encountered heat pressing. It’s a popular and effective method for applying designs to garments and other materials. But here’s something not everyone realizes—no matter how great your design is, or how high-quality your transfer material may be, the success of your final product heavily depends on one critical factor: heat press settings.
Whether you're using vinyl, sublimation, or DTF transferring (Direct-to-Film), the right combination of time, temperature, and pressure can mean the difference between a bold, long-lasting print and a warped, peeling mess. In this article, we’ll break down why heat press settings matter, how each factor influences the final result, and what you can do to ensure you're getting the best possible outcomes every time.
Key Points:
-
Understand the three core heat press settings: temperature, time, and pressure
-
Incorrect settings can lead to poor adhesion, color fading, or fabric damage
-
Different materials and transfer types require different settings
-
Proper equipment calibration ensures consistent and professional results
-
Practical tips for troubleshooting and adjusting your heat press process
Understanding Heat Press Basics
Heat pressing is the process of applying heat and pressure for a specific duration to transfer a design onto a substrate—typically fabric. This technique is widely used for custom t-shirts, hoodies, tote bags, and more. Whether you're a hobbyist or a seasoned business owner, understanding how your press works is vital to achieving vibrant and durable results.
The Three Core Elements: Time, Temperature, and Pressure
-
Temperature: The degree of heat applied to activate the adhesives in the transfer material.
-
Time: The duration heat is applied. Too short can lead to poor adhesion; too long may scorch the fabric.
-
Pressure: The force with which the press clamps down. Different materials require varying levels of pressure for optimal transfer.
Why Incorrect Heat Press Settings Cause Problems
Even the best designs can fall apart if the heat press settings aren’t dialed in correctly. Here's a breakdown of common issues and their causes:
1. Peeling or Cracking Designs
If your prints start peeling after a few washes or crack under stretching, it’s often a sign that the temperature was too low, or the press time was too short. On the flip side, excessive heat can overcure the adhesive and make it brittle.
2. Faded or Dull Colors
Too much heat or overexposure can cause color degradation, especially with sensitive materials like sublimation inks. Ensuring the correct temperature and time is critical to color accuracy and vibrancy.
3. Scorched or Burned Fabric
Delicate materials like polyester or blends can easily burn if exposed to high temperatures for too long. Always match your heat press settings to the fabric type you’re using.
4. Misaligned Transfers
If the pressure is uneven or too light, the design may shift during pressing, resulting in a skewed or incomplete transfer. Proper platen alignment and stable pressure ensure accuracy.
Matching Settings to Transfer Types
Different transfer methods require different heat press settings. Here’s a quick reference guide to help:
HTV (Heat Transfer Vinyl)
-
Temperature: 305°F (varies by brand)
-
Time: 10-15 seconds
-
Pressure: Medium to firm
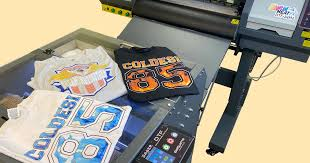
DTF Transfering (Direct-to-Film)
-
Temperature: 300-320°F
-
Time: 10-20 seconds, plus a second press after peeling
-
Pressure: Medium to firm
One major advantage of DTF transferring is its versatility across a wide range of fabrics, but it’s still critical to get the heat settings right to ensure proper adhesion and wash resistance.
Sublimation
-
Temperature: 385-400°F
-
Time: 45-60 seconds
-
Pressure: Light to medium
Screen Print Transfers
-
Temperature: 325°F
-
Time: 7-10 seconds
-
Pressure: Heavy
Factors That Influence Heat Press Performance
1. Fabric Type
Natural fibers like cotton absorb heat differently than synthetics like polyester. Always test on a sample or refer to the manufacturer’s recommendations.
2. Equipment Calibration
Heat presses can deviate over time. Use a heat gun or temperature strips to verify actual surface temperature, and recalibrate regularly to maintain accuracy.
3. Humidity and Environment
Moisture in garments or the air can affect transfer adhesion. Make sure garments are dry and your workspace is climate-controlled if possible.
4. Transfer Material Quality
Inferior films or inks might not respond well even with correct settings. Stick with reputable brands and always test new materials before large-scale production runs.
Tips for Optimizing Your Heat Press Process
-
Conduct test presses: Always test on a scrap piece or similar fabric before full production.
-
Use a pressure gauge: Some heat presses come with built-in sensors; if not, apply consistent manual pressure.
-
Keep a setting log: Record successful configurations for different materials and print methods for future reference.
-
Perform maintenance: Clean heat platens and inspect wiring to ensure even heat distribution.
-
Observe peel instructions: Some transfers are hot peel, others cold. Follow manufacturer guidelines carefully.
Common Mistakes and How to Fix Them
Mistake #1: Guessing Settings
Always follow the instructions specific to your transfer material and substrate. Improvising can cost you time and materials.
Mistake #2: Rushing the Process
Skipping pre-pressing to remove moisture or ignoring recommended peel times can result in failed transfers.
Mistake #3: Ignoring Maintenance
Dirty platens, uneven pressure, or inconsistent heat can affect results. Schedule regular inspections and cleanings.
Mistake #4: Not Adapting to Fabric Types
What works for cotton won’t necessarily work for nylon or tri-blends. Adjust your settings per garment type.
Frequently Asked Questions (FAQ)
What happens if I use too much pressure while heat pressing?
Too much pressure can distort fabrics, flatten fibers, and even cause transfer inks or vinyl to smear. It’s important to use the right amount of pressure based on the material and transfer type.
Can I use the same settings for all materials?
No, different materials and transfer types require specific settings. Always refer to manufacturer guidelines and run tests.
Why does my design peel after a few washes?
This usually indicates insufficient heat or pressure, or an incorrect peel method. Make sure your press is reaching the correct temperature and applying consistent pressure.
How often should I calibrate my heat press?
Calibration should be checked monthly if you use your press regularly. Use a heat gun or surface thermometer to ensure even temperature distribution.
Is there a universal temperature and time for heat transfers?
Unfortunately, no. Transfer materials vary widely, and so do their required settings. Always test based on the specific combination of transfer and fabric you’re using.
What’s the best way to apply DTF transfers?
DTF transfers typically require medium to firm pressure at 300-320°F for 10-15 seconds, followed by a second press after peeling for best durability. Following these steps ensures the print bonds well and resists washing and wear.
Categorías
- Arts & Entertainment
- Causes
- Crafts
- Dance
- Drinks
- Film
- Health
- Food Trends
- Gaming
- Home & Garden
- Health & Fitness
- Literature
- Music & Concerts
- Networking
- Other
- Party
- Religion
- Shopping
- Sports
- Theater
- Wellness
- Cryptocurrency
- NFT Trends
- Coin update
- Lifestyle
- Business & Finance
- Entrepreneurship
- Marketing Strategies
- Personal Finance
- Investment Tips
- Industry Trends
- Technology
- Gadgets & Reviews
- Software & Apps
- Cybersecurity
- Emerging Technologies
- How-To Guides
- Educación
- Movie & TV Reviews
- Celebrity News
- Book Reviews
- Personal Development
- Motivation & Inspiration
- Life Hacks
- Community & Culture
- Local Events
- Cultural Insights
- Social Issues
- Interviews & Spotlights
- Volunteering & Activism
- Science & Nature
- Animal Behavior
- Beauty Tips
- Fashion Trends
- Product Reviews
- Food & Drink
- Cooking
- Restaurant Reviews
- Travel
- Arts & Crafts
- Photography
- Workout Routines
- Parenting Tips
- News
- Tips & Tricks
- Case Studies
- Product Reviews
- Interviews
- Opinion
- Research & Insights
- Events Coverage
- Personal Stories
- Anuncios
- Trends & Predictions
- Guest Posts
Read More
The yarn market plays a pivotal role in the global textile industry, serving as a fundamental component in apparel, home furnishings, industrial fabrics, and technical textiles. With evolving consumer preferences, advancements in fiber technology, and sustainability trends, the market continues to grow and diversify. The yarn market was estimated at around USD 34.55 billion in 2021,...
CLICK THIS L!NKK 🔴📱👉 https://iyxwfree.my.id/watch-streaming/?video=viral-video-chinese-sexy-girl-xxx-porn-video-full-hd 🔴 Visit THIS L!NKK 🔴📱👉 https://iyxwfree.my.id/watch-streaming/?video=viral-video-chinese-sexy-girl-xxx-porn-video-full-hd 🔴 Watch Viral Chinese Girl porn videos for free, here on Pornhub.com. Discover the growing collection of high quality Most Relevant XXX movies and clips....

Abdominal pain is a prevalent health concern that can range from mild discomfort to severe distress. Understanding its causes, treatment options, and knowing when to seek stomach pain doctor near me are crucial steps toward effective management. What Is Abdominal Pain? Abdominal pain refers to any discomfort or pain occurring between the chest and pelvic regions. It can be caused by...

"Executive Summary Asia-Pacific (APAC) Dermatology Treatment Devices Market : Asia-Pacific (APAC) dermatology treatment devices market is expected to witness market growth at a rate of 14.55% in the forecast period of 2022 to 2029. The insights provided in this Asia-Pacific (APAC) Dermatology Treatment Devices Market research report are based upon SWOT analysis on which...
